Break down a Project
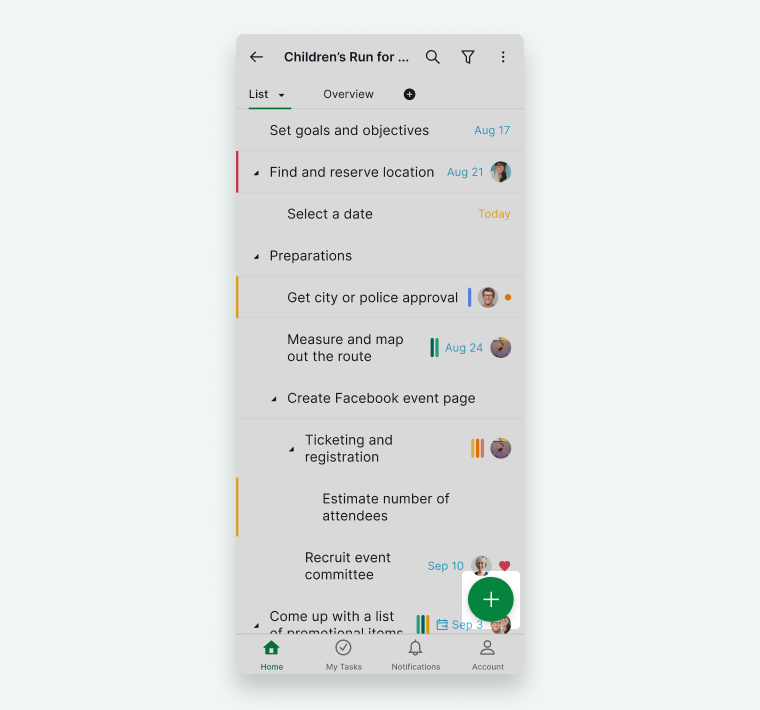
First, select a project in the Home tab. Then, begin breaking down your ideas into a list of tasks. To create a new task, tap the green + button at the bottom right corner of the screen.
You can give your tasks more details, such as assigning due dates, setting assignees, and adding tags, etc.
Check out our Youtube channel for mobile tutorial videos!
Learn how to add tasks using Siri.
Views
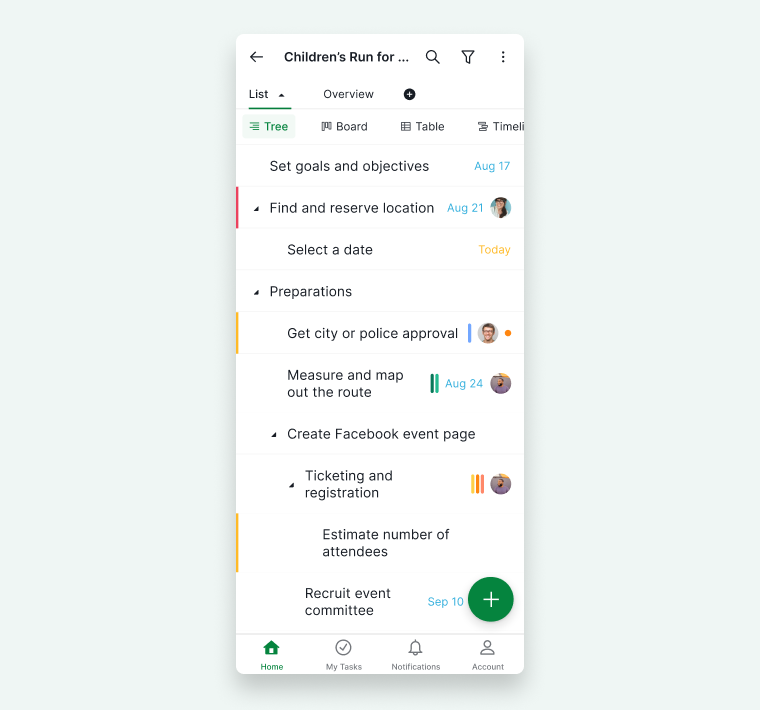
There are several different views for a project: Tree, Board, Table, Timeline, and Calendar. The Task view is the default view when you first access the project.

Tree view
For big, challenging projects, you can break down ideas into chunks, and further into small, bite-sized pieces. You will then get a well-structured, well-planned hierarchical actionable list of tasks and subtasks.
Board view
A task list is for you to dump all of your thoughts and break big ideas down from big goals to digestible tasks. On the other hand, the Board view aims to help you visually carry out your project step by step.
Tap the Board button to switch to the Board view.
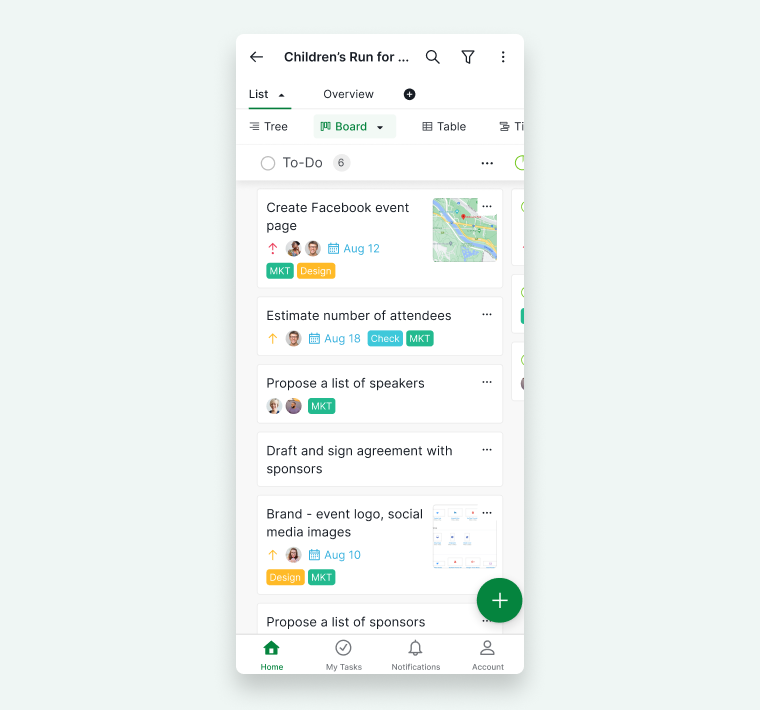
By dragging and dropping tasks between columns, you can efficiently manage your team’s workflow and ensure everyone remains aligned.
Tap the Board button again to access additional options, such as shuffling board columns, hiding empty columns, toggling custom fields on or off in the board view, or grouping tasks with their parent tasks.
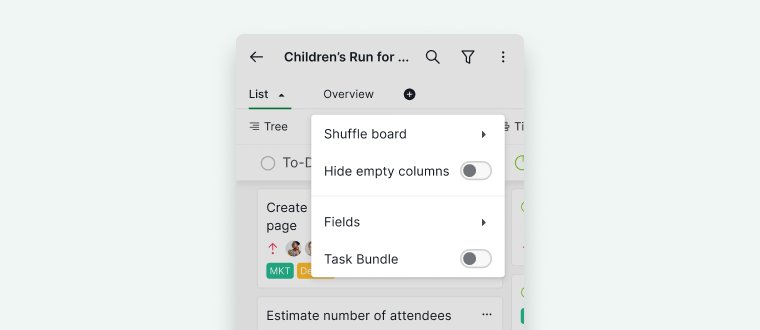
Table view
The Table view is only available in the Professional, Premium, Enterprise plans. In the Free subscription plan, you can create one custom field for each project and one formula in each custom field. Upgrade your subscription plan to add more custom fields and formulas. More information can be found on our pricing page.
The Table view allows you to switch up your task list into a structure of a database. It will organize and provide your list with a layout of a spreadsheet, allowing you to view more information in one glance.
Tap the Table button to switch to the Table view.
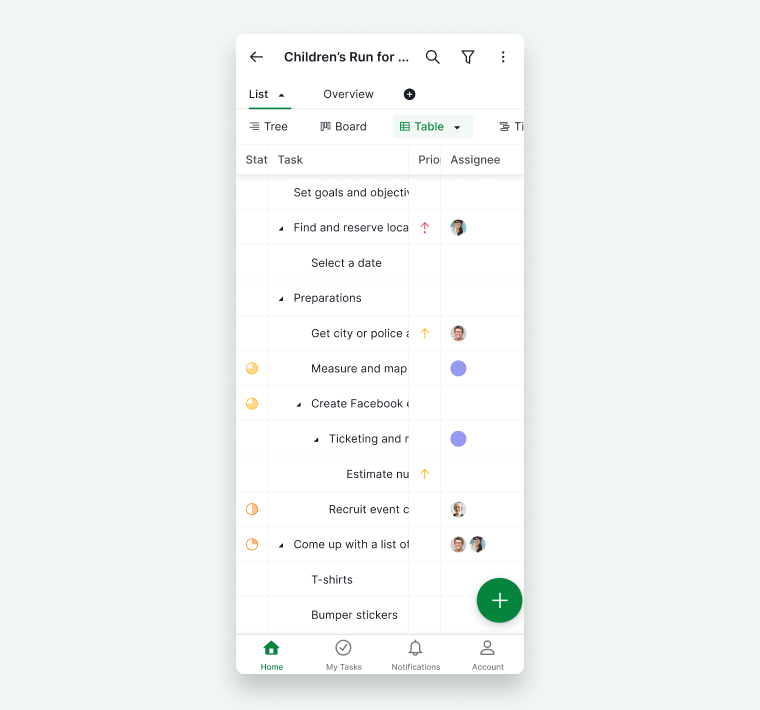
Tap it again to access additional options, toggling custom fields on or off or changing the row height.

Timeline view
The Timeline view is only available in the Professional, Premium, Enterprise plans. More information can be found on our pricing page.
The Timeline view is a horizontal bar chart that illustrates the entire project schedule. The bars in this view represent a task in the project and the length of the bars visualizes the duration of the task. It can help you spot the roadblocks and make adjustments immediately for your project in a visual way.
Tap the Timeline button to switch to the Timeline view.
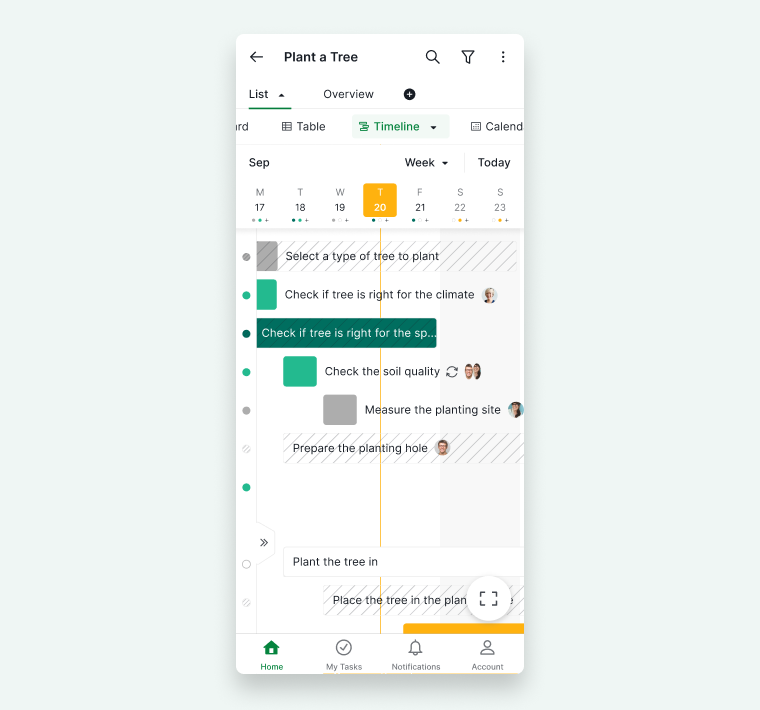
Color dots indicate that a task has an assigned date and are visible on the Timeline view. Tap the dot to navigate directly to the task’s timeframe bar.
To hide the task list in the Timeline view, tap the arrow icon on the left-hand side.
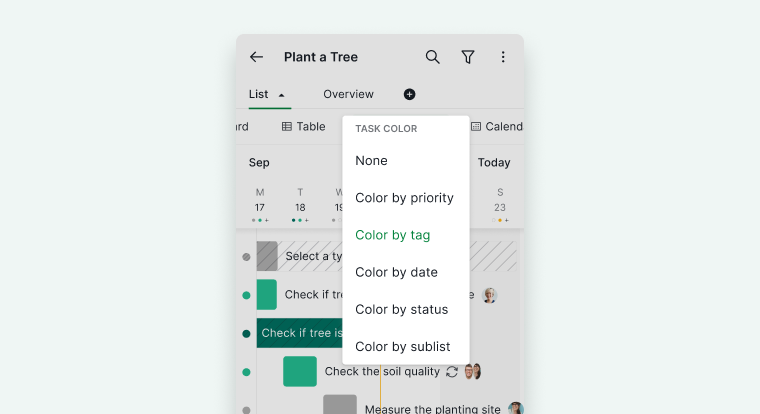
Tap the Timeline button again to customize the color of task bars by different options such as priority, tags, dates, statuses, or sublists.
Calendar view
The Calendar view is only available in the Professional, Premium, Enterprise plans. More information can be found on our pricing page.
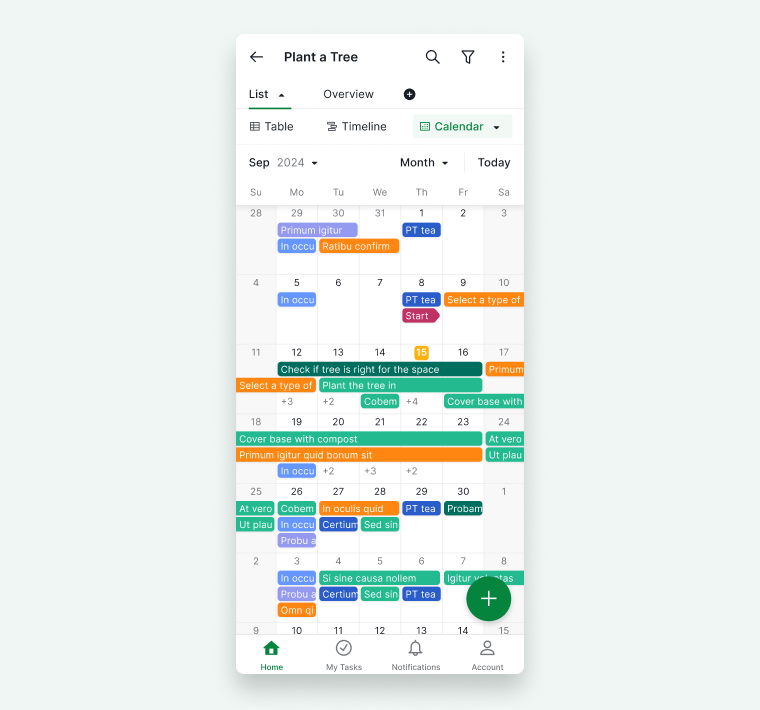
The Calendar view can help you visualize your project’s milestones. Use this view to plan out the important launch dates for your product or the social media events for your marketing team.
Tap the Calendar button to switch to the Calendar view.
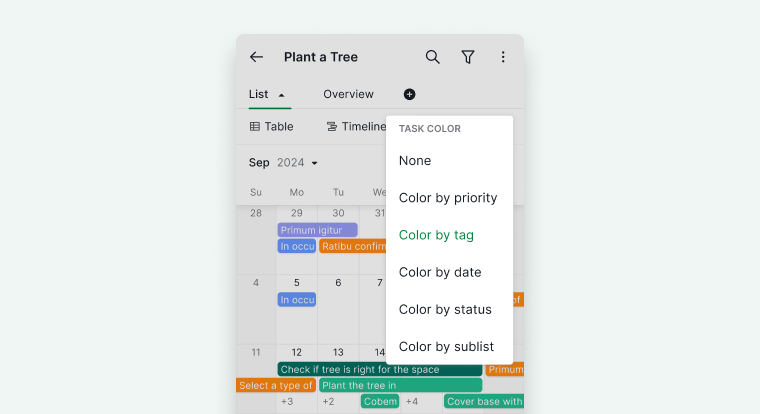
Tap the Calendar button again to customize the color of the task by different options such as priority, tags, dates, statuses, or sublists.
Create a sublist
A sublist lets you create your own personal list view or a narrow-down view of the same project.
Tap on the + icon at the tab bar and enter the name of the sublist, then set who you would like to share the sublist with (project members or keep the sublist personal).

Filters
The default filter for each task list is Active Tasks.
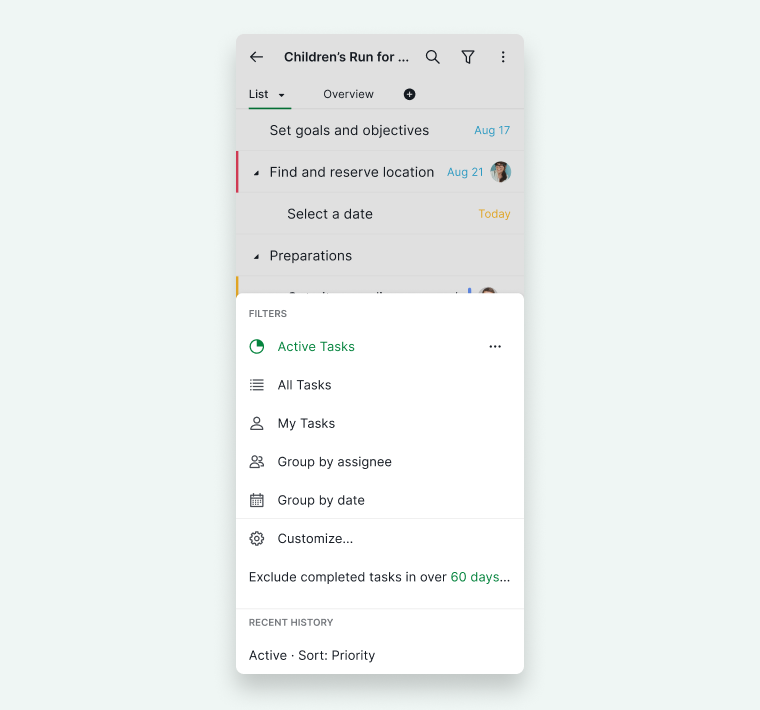
Tap on the filter icon at the upper right corner to access a list of preset filters, such as Group by assignee and Group by date.

In the filter menu, create your own filter by tapping on Customize.
Choose from the different options in the filter bar at the top. You can group, sort, or filter your tasks by their priority, assignees, status, dates, etc. After finishing customizing your own filter, tap Apply.
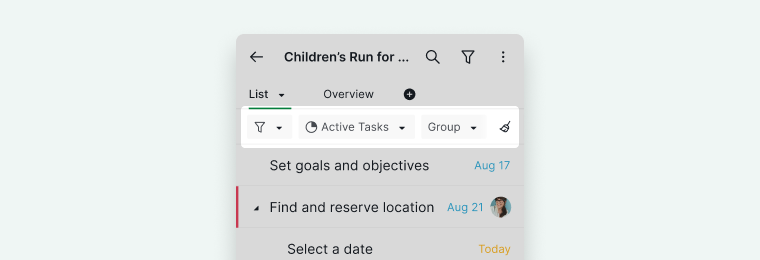
Tip: You can group or filter your tasks up to two different options.
To save the customized filters, tap on the star icon on the right side of the filter bar. You will find all the saved customized filters in the filter menu when tapping on the filter icon on the upper right corner of the screen.

Project members
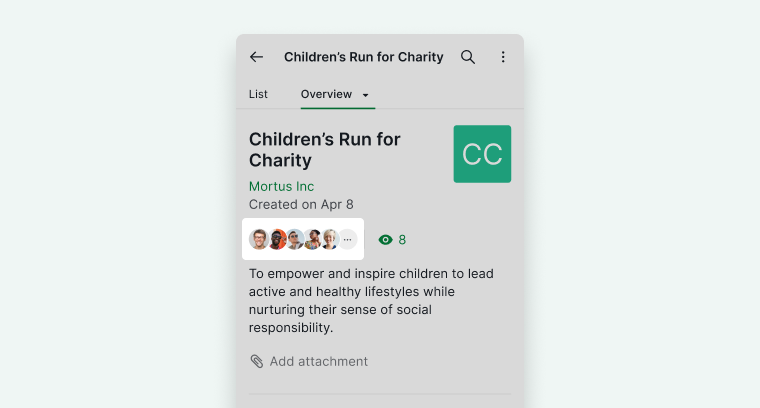
If you would like to see the list of members of the project, tap on the Overview tab at the top of your project first. Then tap on the members icon .
Or tap on the More Options icon at the upper right corner, then Edit project. You will be able to modify the project members and external team members there.
Tip: You can also share your projects with clients (who haven’t signed up for a Quire account) to showcase your project’s progress or contents. They can open the link on their mobile devices after downloading the Quire app first.
Global tags
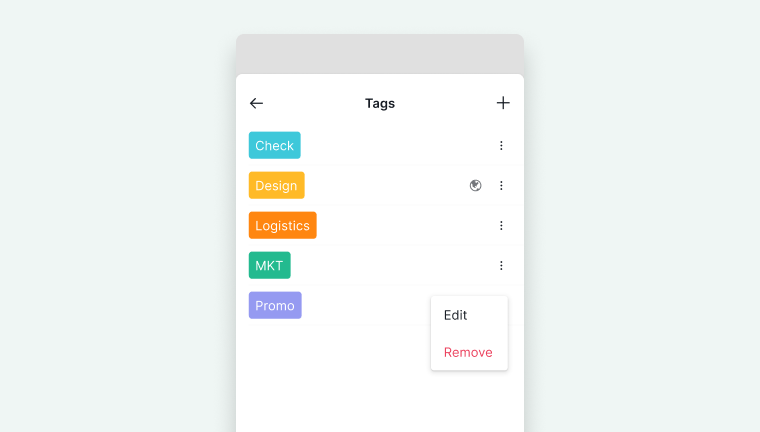
If you would like to view all of your tags for the project, tap on the More Options icon at the upper right corner, then Edit project, then Project Tags.
If you set the tags to be Visible to all projects, you won’t need to create the same tags again in other projects within the same organization.
To set the tags visible to all projects (global tags), tap on the More Options icon for the tag, then Edit tag, and toggle on Visible to all projects.
Display mode
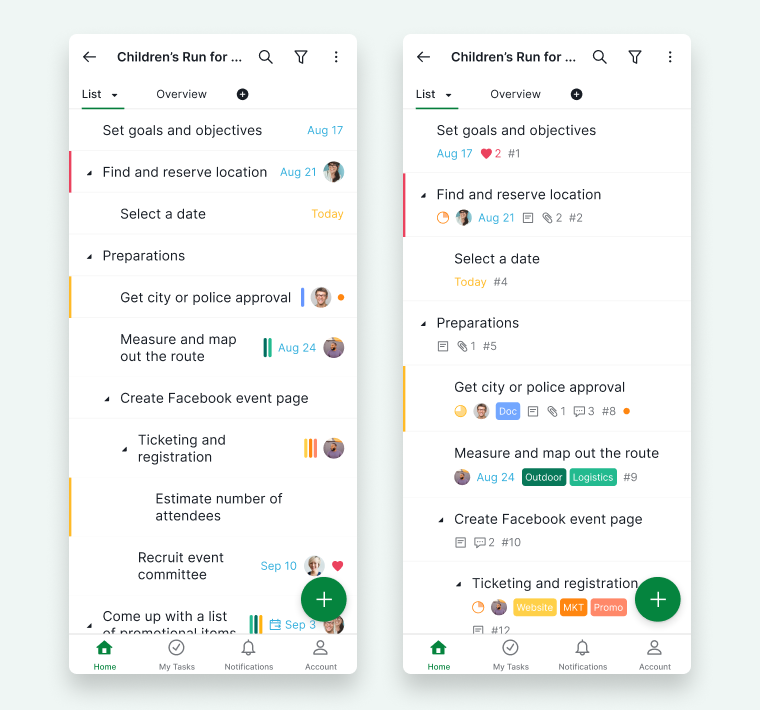
Our default display mode for the project is Basic. If you would like to see more information, you can go to the Account Settings and set the display mode to Advanced.
Tip: You can also toggle between two display modes by shaking your phone.
